– A Step-by-Step Guide for installing an Electric Strike –
In my 10+ years in the locksmith and door service industries, I’ve completed many electric strike installations. The electric strikes on the market today, those known as compact or low profile electric strikes, are marketed as easy to install, plug-and-play strikes. While these can be, and typically are, much easier to install than the old school, heavy duty, traditional electric strikes. Often, in the real world, the low profile electric strikes still require some manipulation and on-site door frame preparation.
Recently, I was asked to do an electric strike installation at a multi-unit dwelling in San Francisco. They are undertaking a remodel of the entire building and need some door and hardware work completed. My client provided me with the electric strikes – a HES 8000 and a HES 5000. These are both good, low profile strikes.
My client specified that he wanted the HES 5000 on the interior door and the HES 8000 on the front, exterior/main door. In my experience, the HES 8000 can sometimes provide a little resistance upon opening. The HES 8000 is also fairly new on the market (replacing the HES 5900) so I’ve had more experience with the HES 5000. Therefore, I decided it would be best to install the HES 5000 on the exterior/main door and the HES 8000 on the interior door.
Like I said before, in a perfect world, the HES 8000 (or 5000) would require no modification of the existing door frame. However, in my experience, typically some door frame modification is required.
I’ve included some pictures here to give an example of the HES 8000 electric strike installation.
Here’s a before picture with the initial, regular strike (aka an ANSI strike). This was taken before I started any work.

ANSI Strike
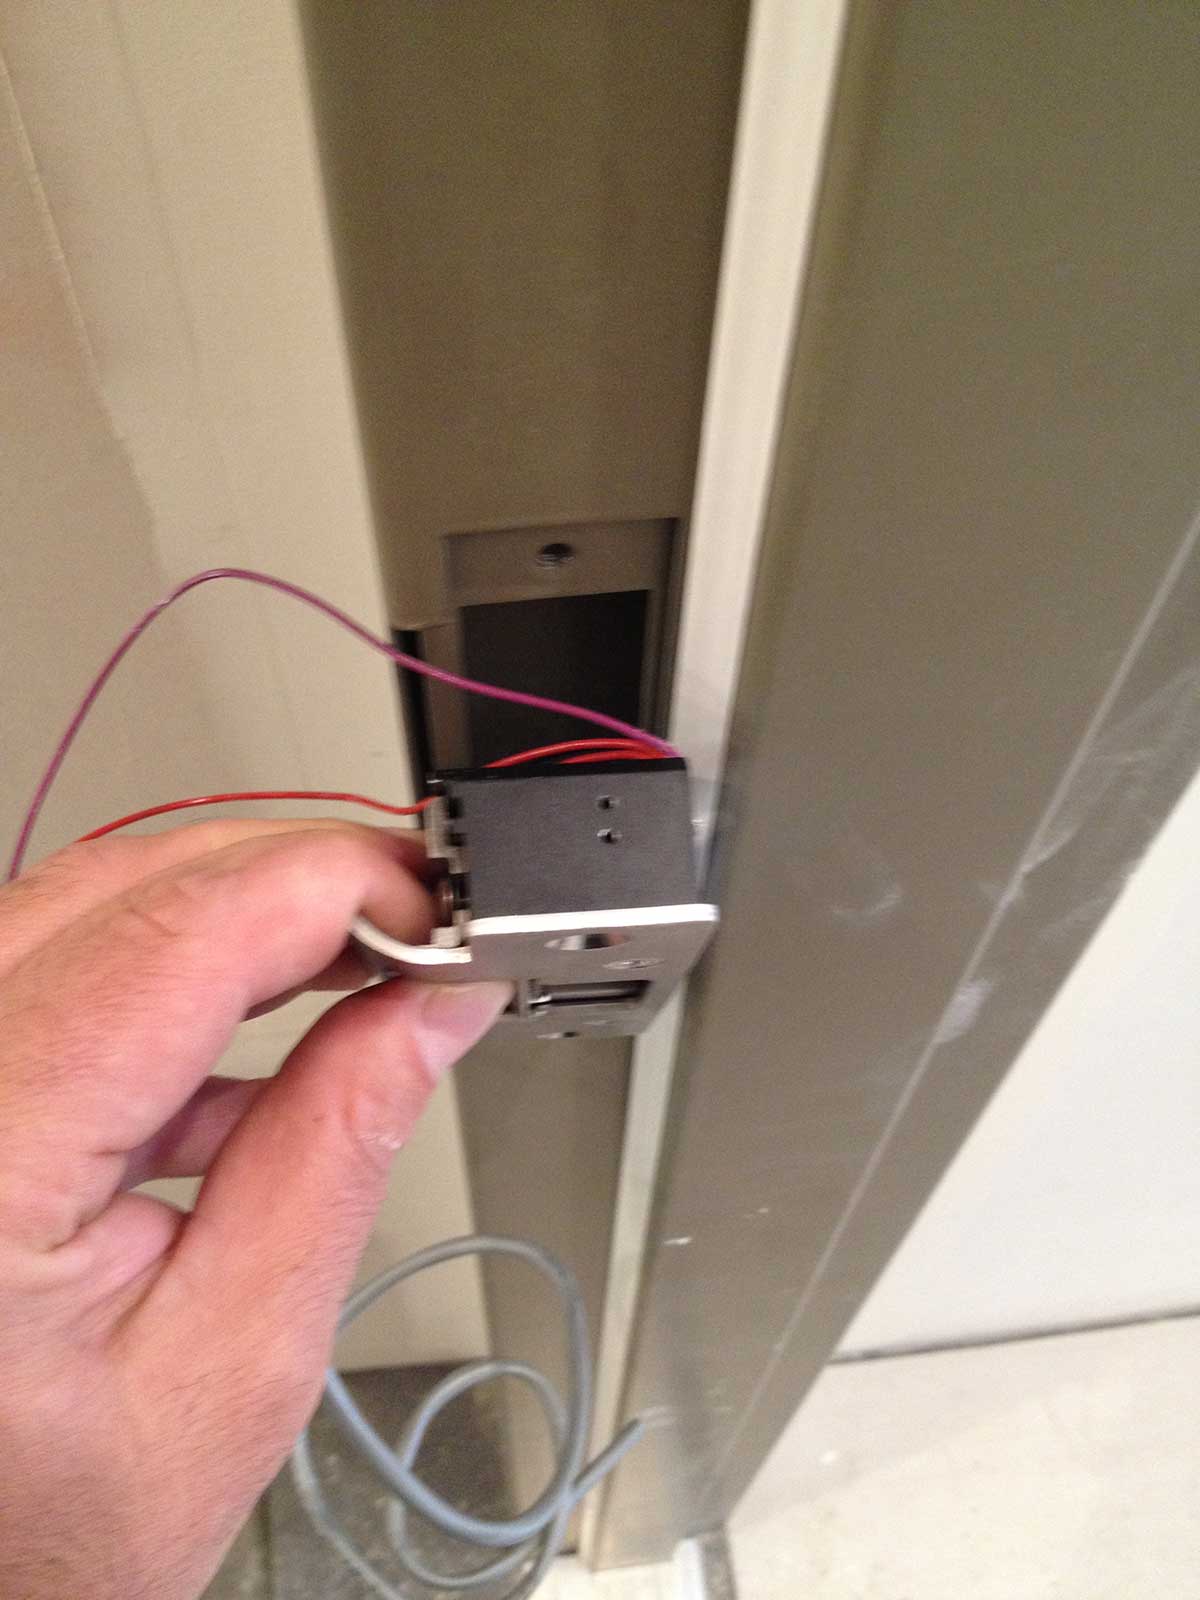
Here’s a picture of the ANSI strike on the door frame and the HES 8000 in my hand.
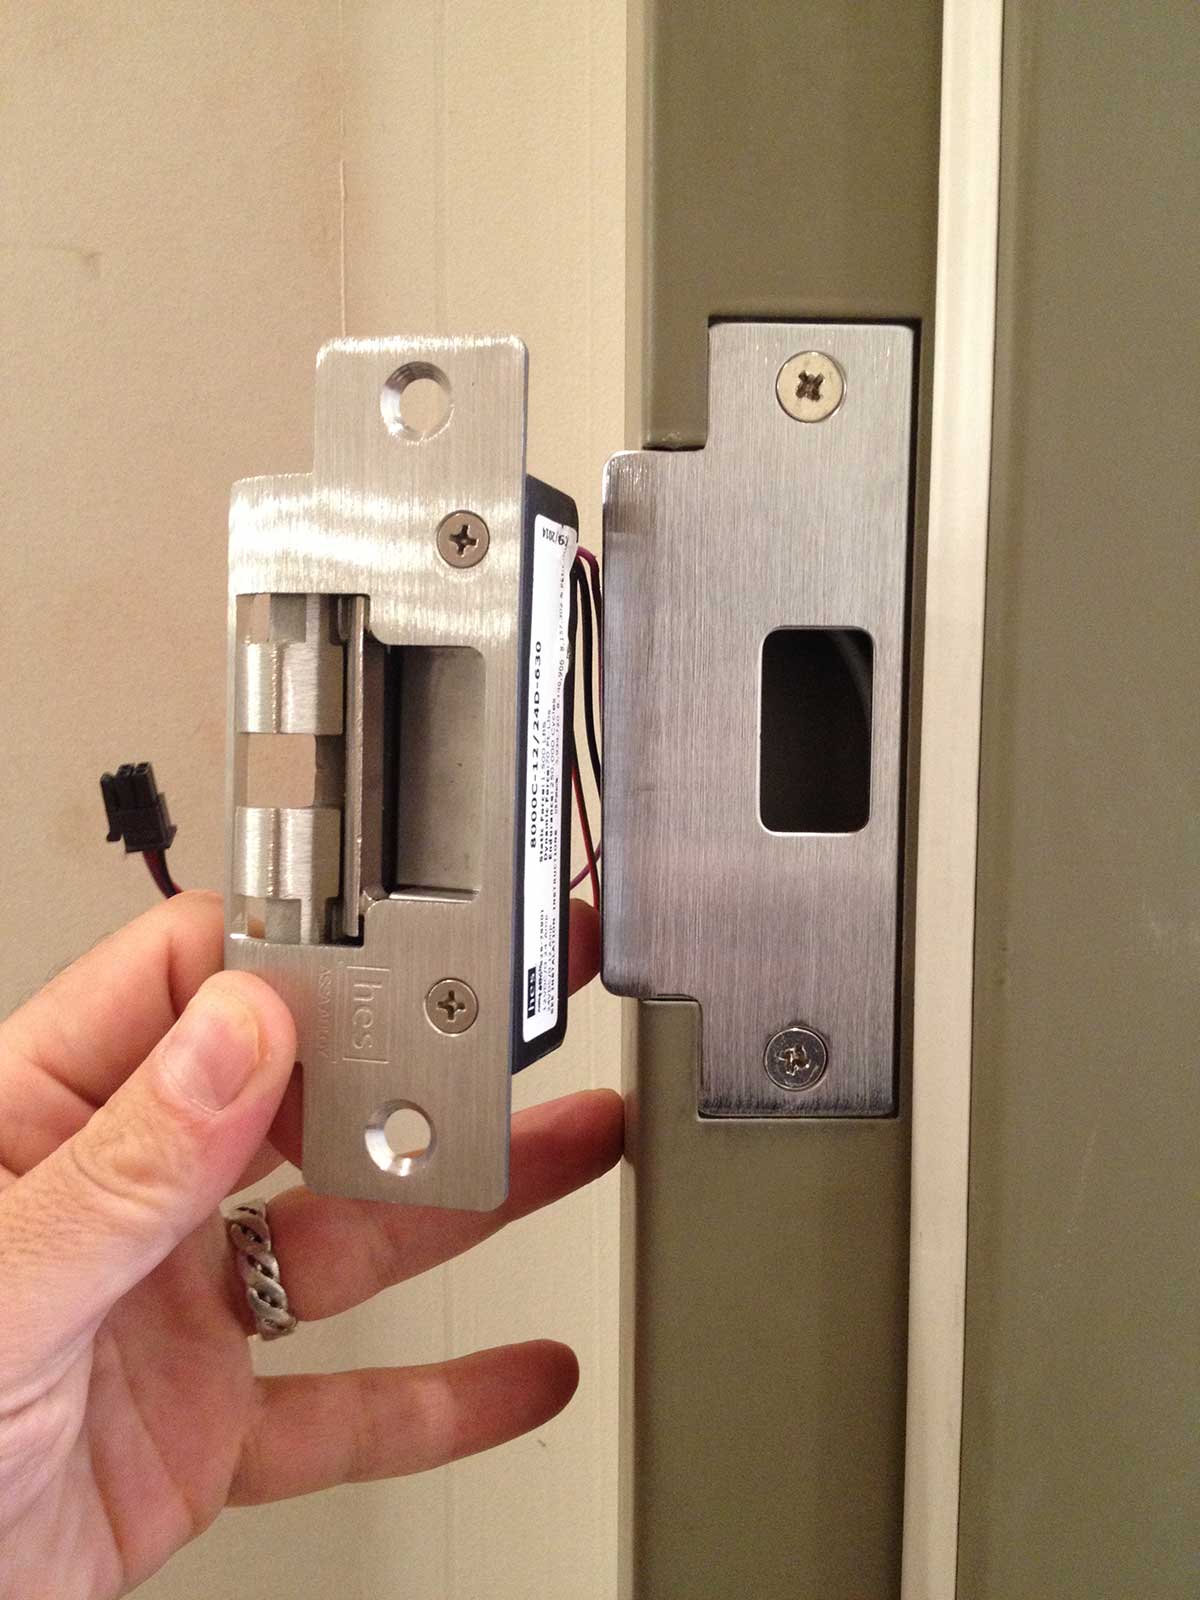
ANSI Strike and HES 8000 Electric Strike
My first task was to remove the existing strike. This is very simple. I always have my driver with me (you can use a screw driver as well) and the screws come out in seconds.
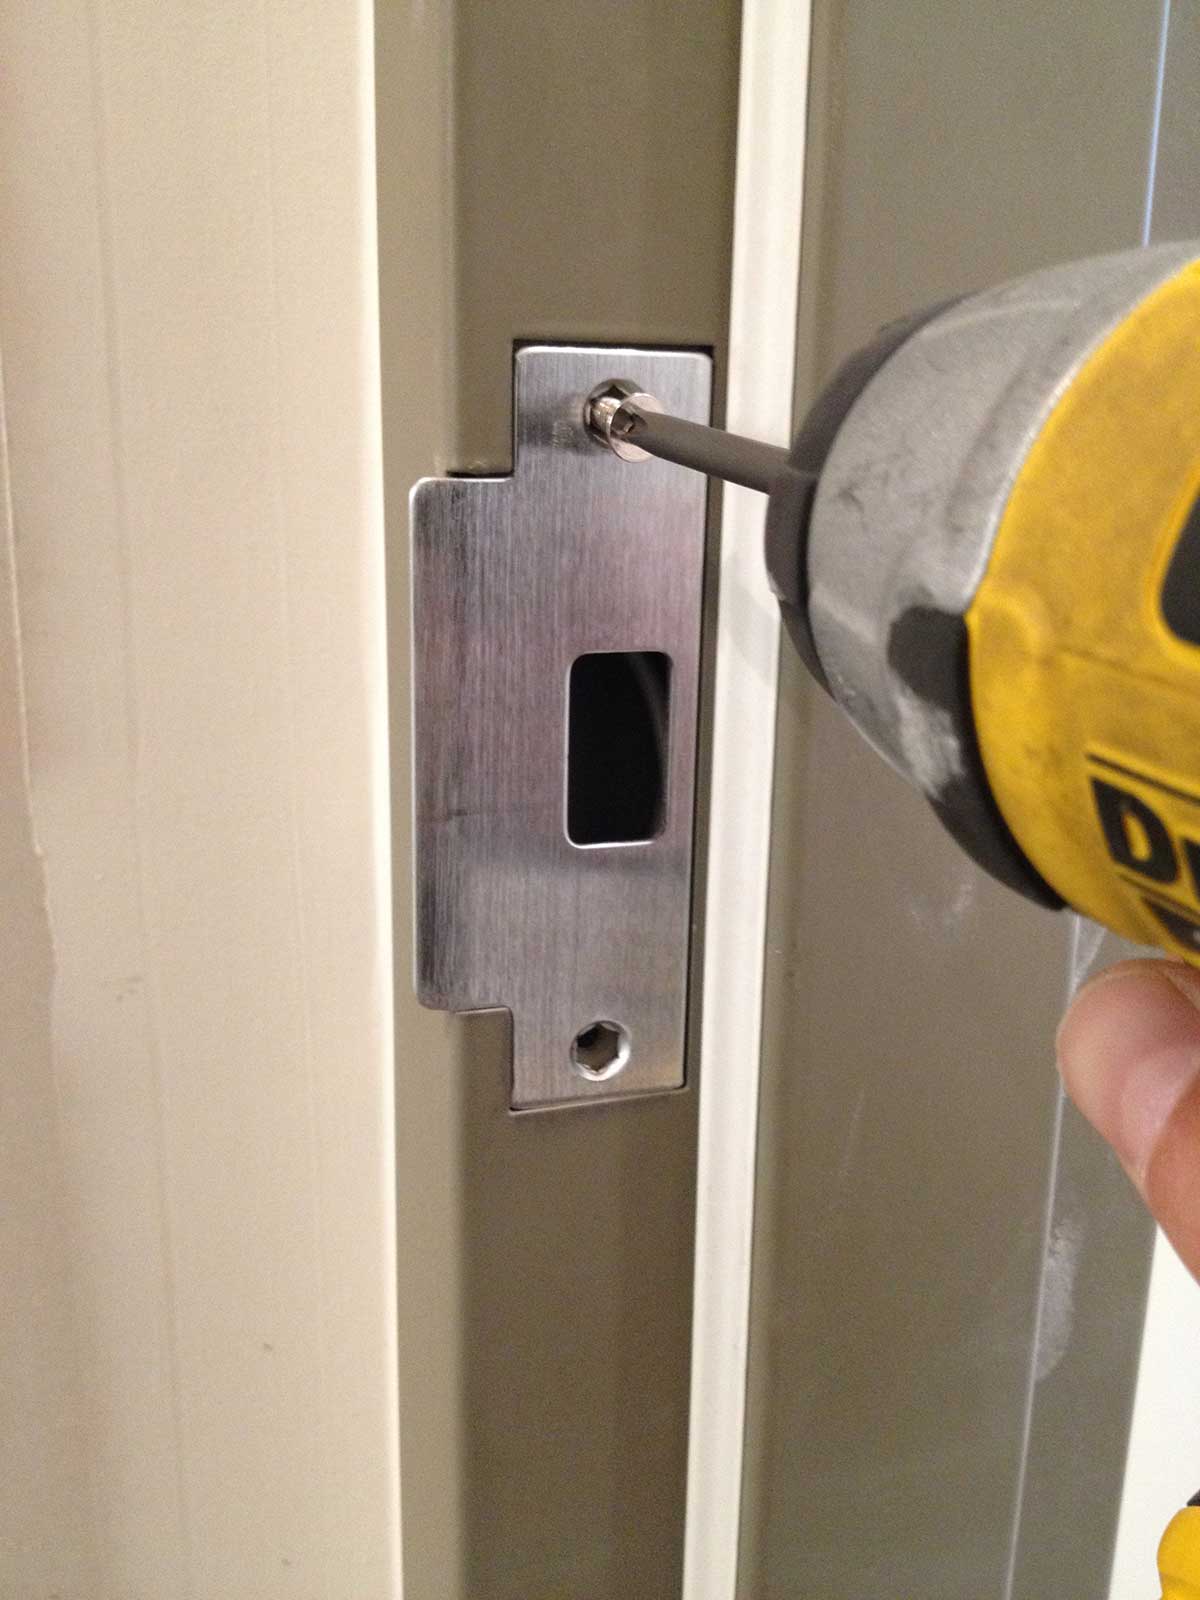
Removing ANSI Strike
This is another picture of the frame without any strike installed. As you can see the frame has already been wired. Now there is a problem here that will reflect on the entire installation. The alarm company, which is my client here, ran the low voltage cable all the way to the strike. They left enough cable, which is a good thing, for some reason, they fastened the cable to the stud up above the frame. This means that I cannot pull, push or manipulate the cable to keep it safely out of my way and out of the way of my power tools (drill bits, grinder, burrs, chisel, etc.). The problem is, that if I happen to damage that cable, I won’t be able to cut it and pull more out. This means I must be extremely careful during the installation. My work area is much more limited than it could be.
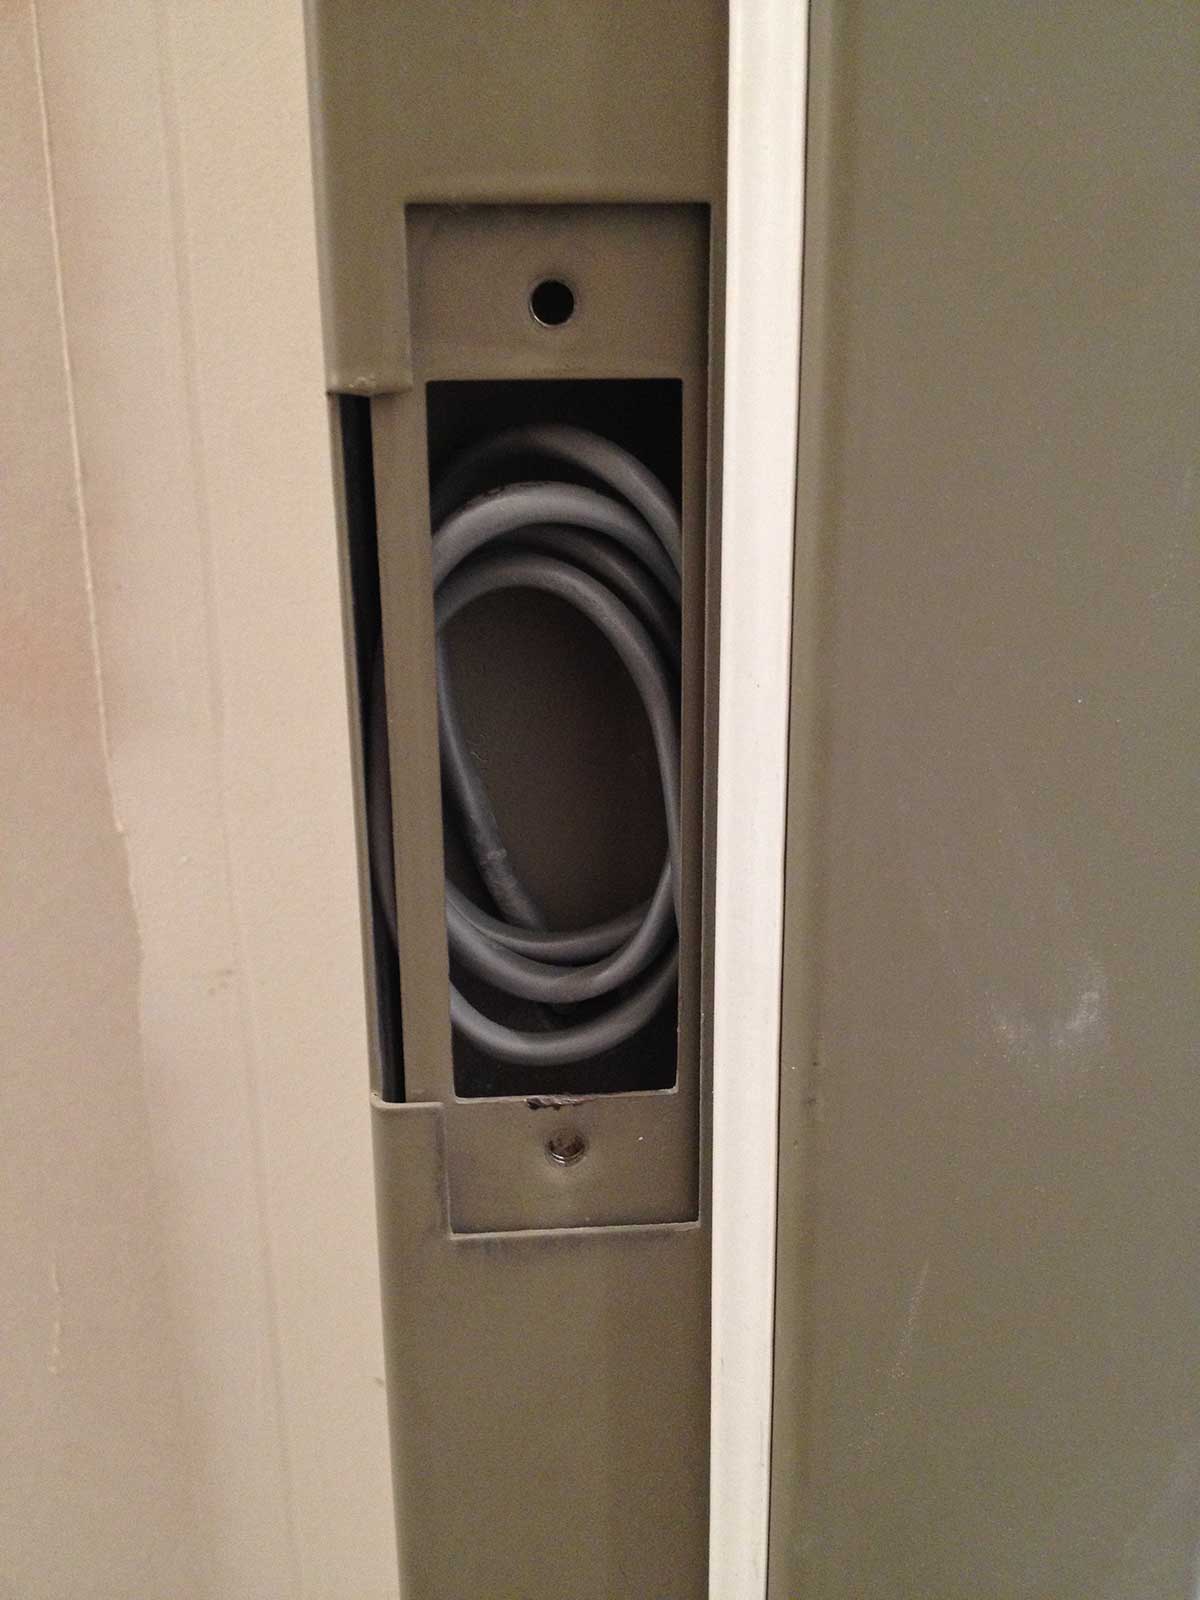
Dust Box in Frame
Another problem, is that they ran the wire to the bottom of the dust box in the door frame. By the way, the dust box is simply a metal box within the door frame which accepts the strike. In some doors, especially residential, they don’t have dust boxes. In these cases, when you look at the frame and where the latch goes into the frame, you will see just wood. Take a look at this picture showing the wire at the bottom of the dust box.
Wire run to the BOTTOM of Dust Box
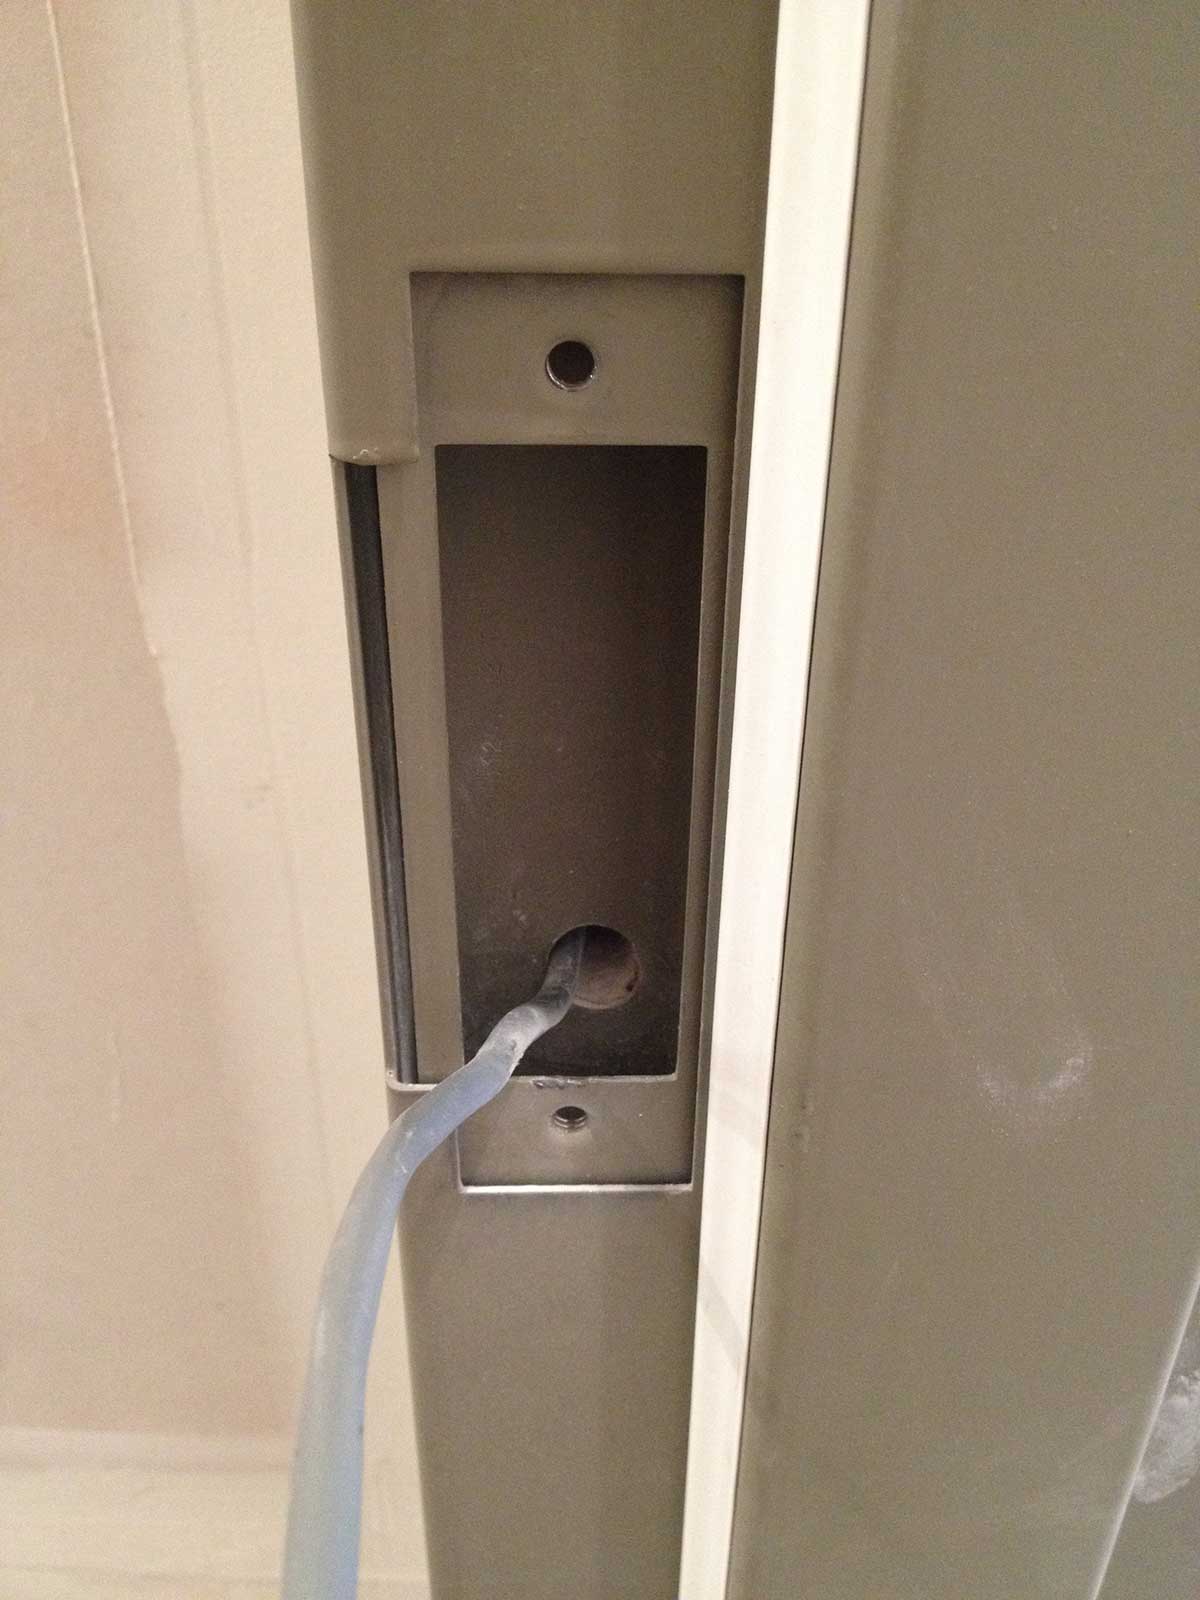
As you can see below, the HES 8000 has the wires located at the top of the strike. Since the wires in the door frame are at the bottom of the dust box, I must now leave additional space in the frame in order to run the wires from the top of the strike to the wire located at the bottom of the strike prep.
HES 8000 Electric Strike – notice wire on top and strike depth
The HES 8000, in this case, is too deep to fit directly into the frame. Therefore, I must now remove the dust box and modify the frame in order to complete this installation. It’s hard to tell from the pictures but we only had ¾” deep dust box. The HES 8000 is 1-1/6” deep.
To remove the dust box, I’ve developed a little technique here. My goal is always to keep things looking as nice and professional as possible while completing the electric strike installation in a solid, secure manner. I want my work to be aesthetically pleasing, safe, secure and hold up for many, many years.
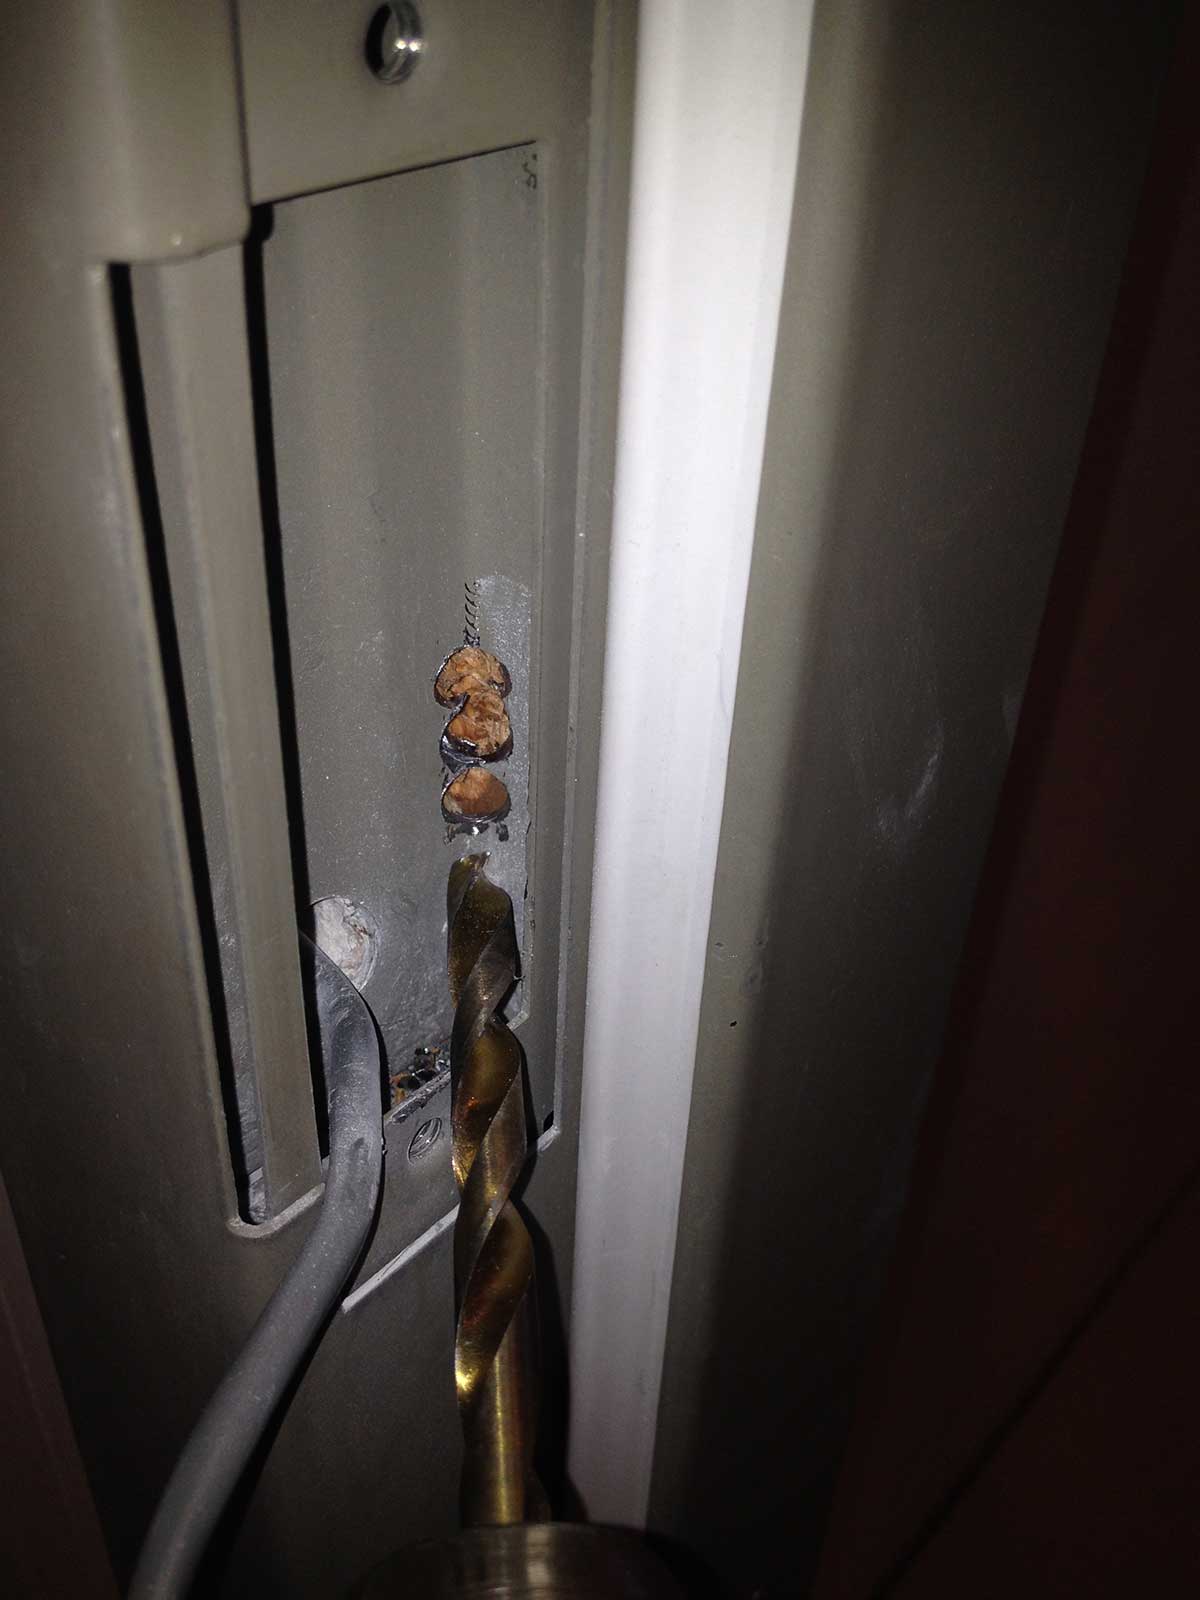
Drilling Holes in the Dust Box
First, I drill holes in the side, very carefully.
Next, I take a cold chisel (for metal cutting) and chisel the area in between the holes to get the entire side of the dust box cut so I can remove it from the door.
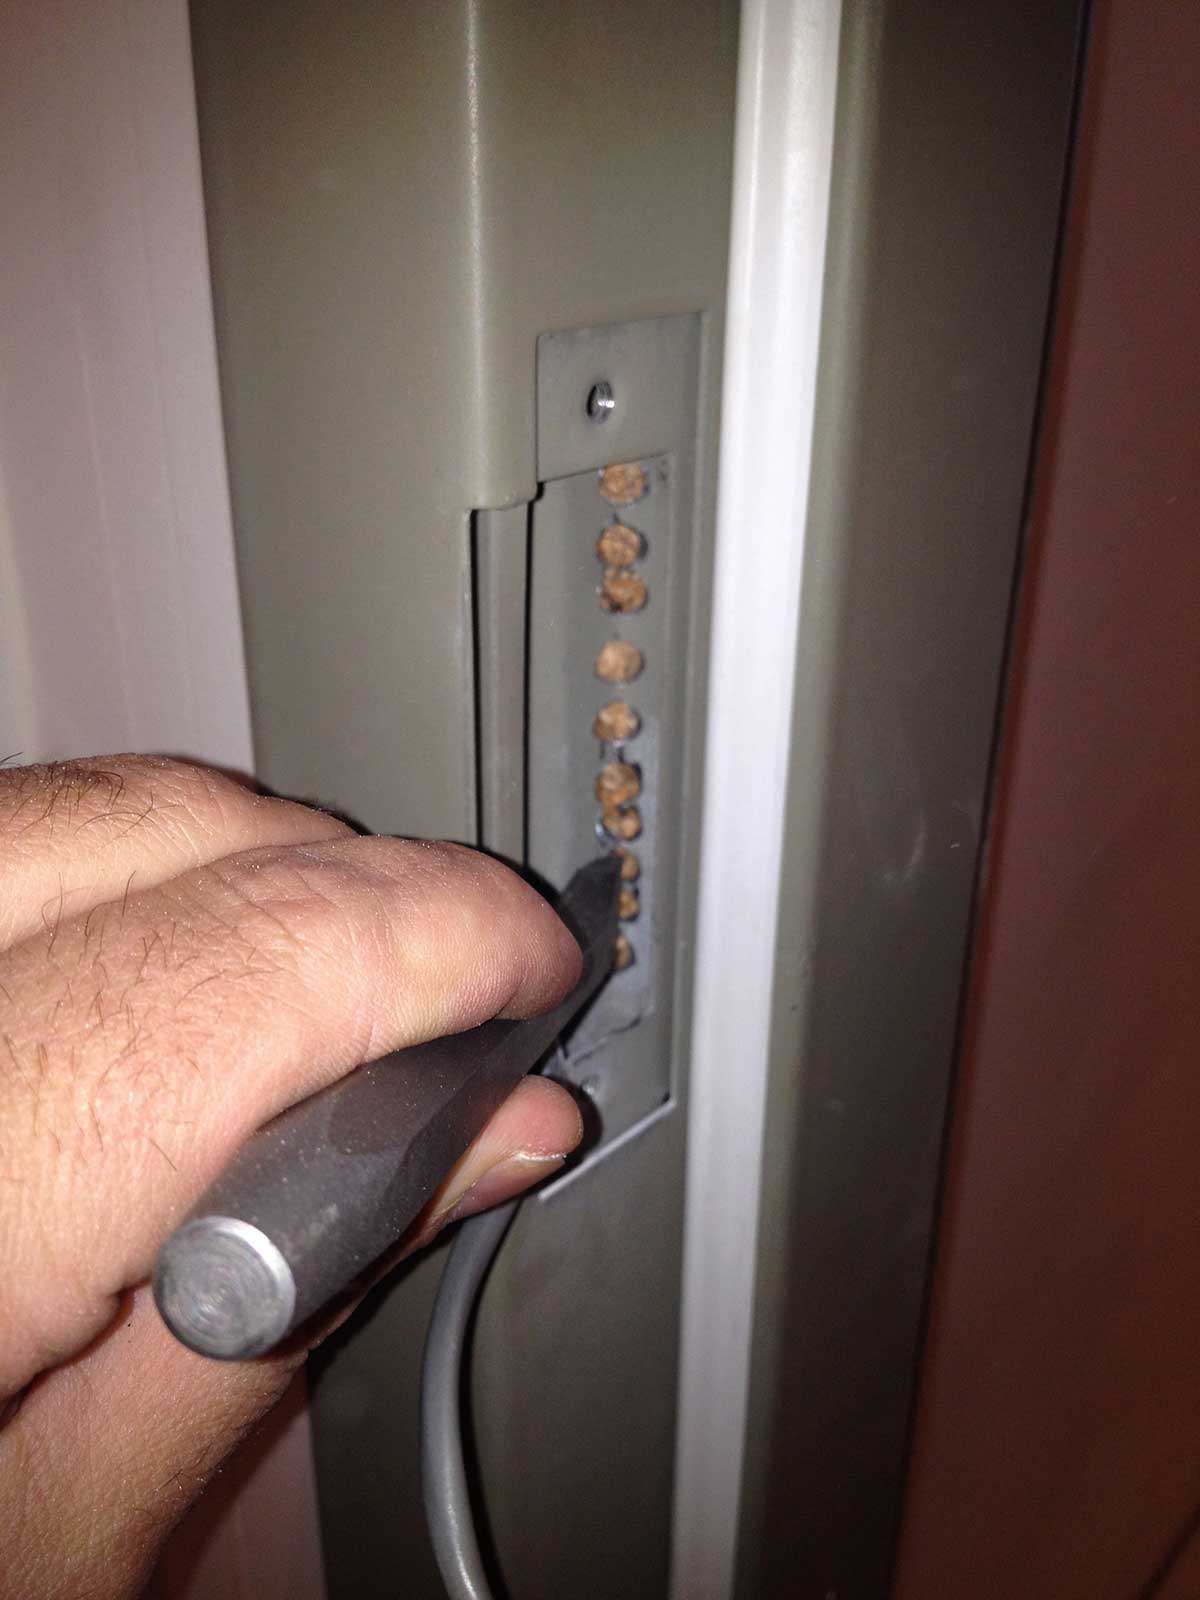
Cold Chisel to the Dust Box
After removing it completely, I take my grinder and make the inside of the metal nice and smooth; removing any jagged edges so it’s nice to look at, won’t accidentally hurt anyone or damage any wires or anything.
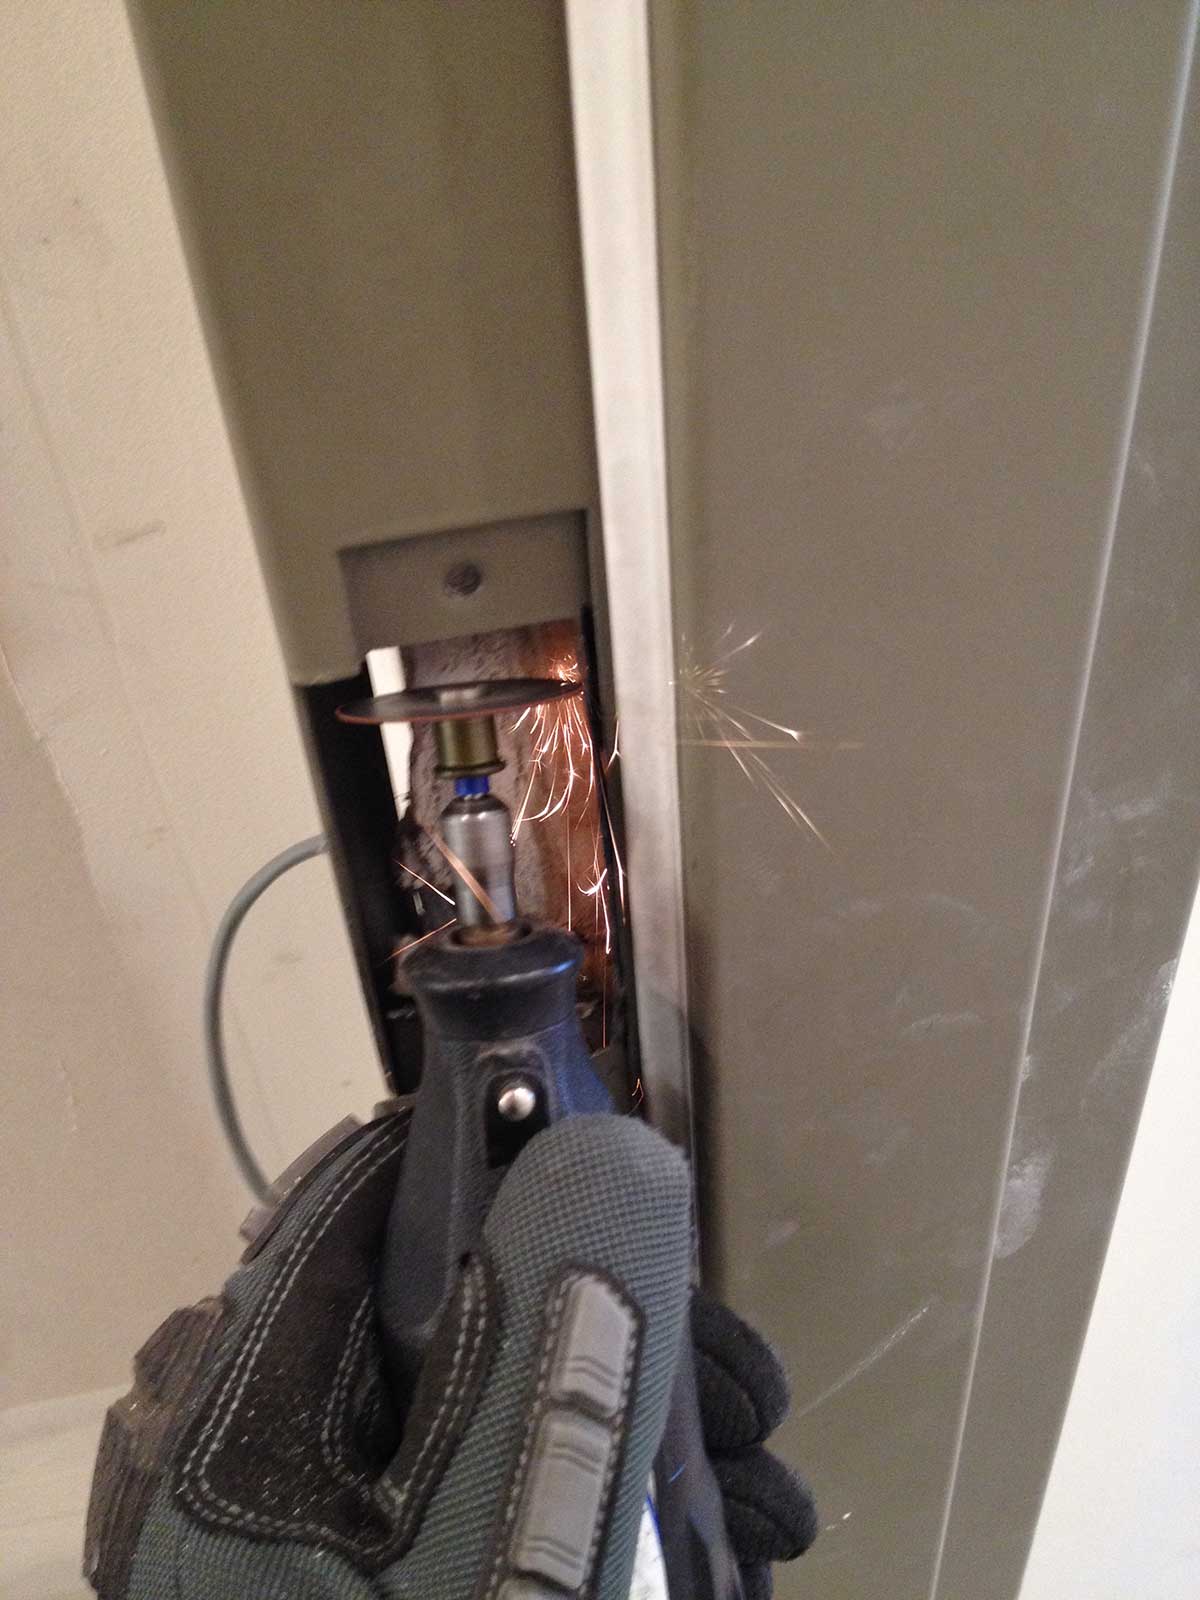
Grinder to the Dust Box
After this I take my wood chisel and chisel aware some of the inside of the wood frame to increase the depth for my electric strike installation.

Wood Chisel to the Dust Box
At this point, it becomes really easy. I prepare the wires of the electric strike so that they are ready to attach to the cable. HES is great as they supply both 12v and 24v wires. We just have to use the correct ones. In this case, they are using 24v. I didn’t actually connect the cable with the electric strike wires as my client specified that they wanted to do all the wiring. But that’s an easy thing to do.
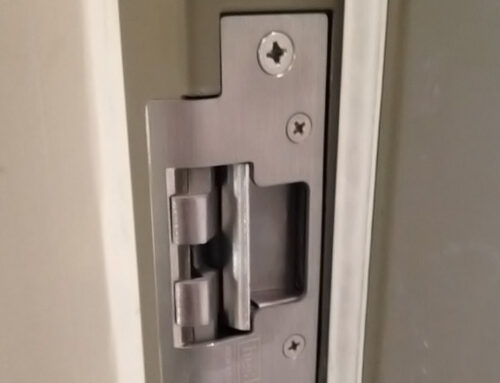
Then I place the electric strike in the door frame, screw it in and that completes my electric strike installation.
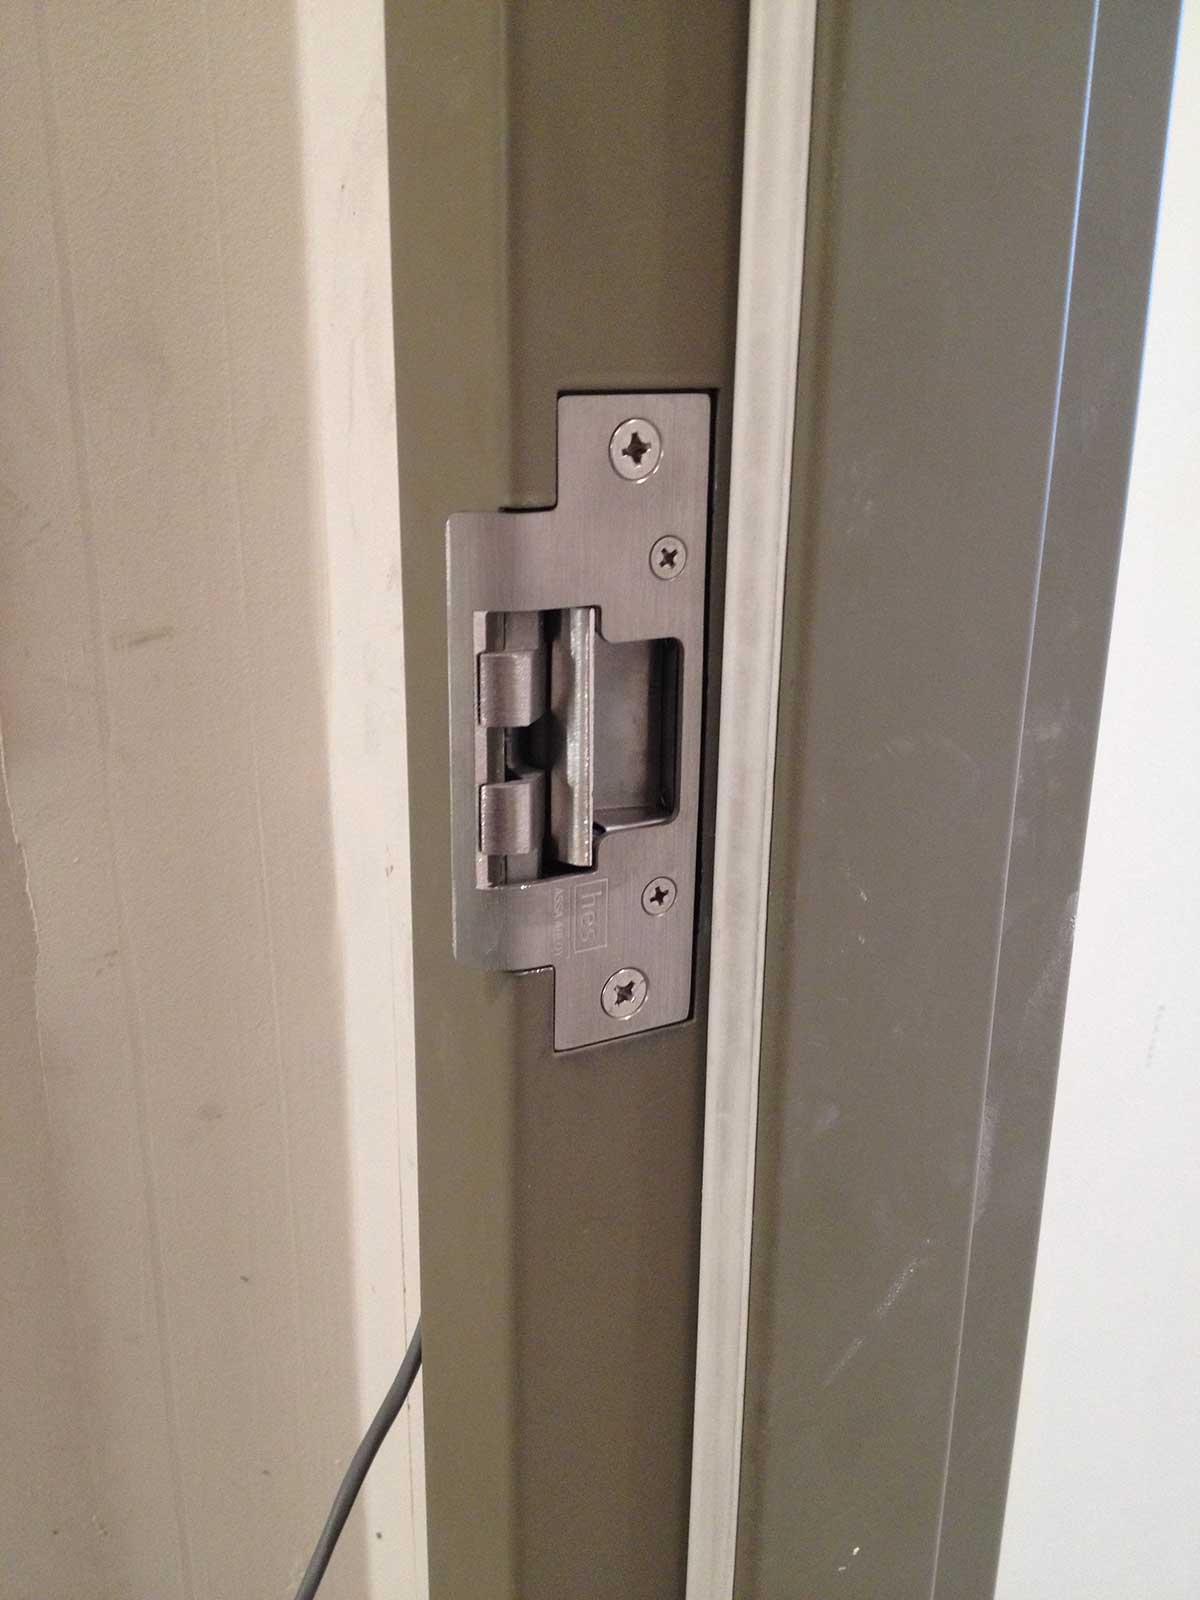
HES 8000 Electric Strike Installed
So, for a strike that is touted as a plug-and-play strike, it didn’t work out that way during this installation. However, as you can see, after a bit of manipulation, this electric strike installation occurred fairly easily and it looks great. It took me about an hour or so to complete everything. But I’ve been doing this for quite some time so I’m used to dealing with these things. That said, I like to do things right and so I don’t rush my work. I believe in quality work and I take a lot of pride in what I do. And I’ve found out that my favorite customers have the same mindset. They are willing to do what it takes to get quality work done on their projects.
For more Commercial Locksmith and Door work, please check back. I will be posting some pictures of the HES 5000 install soon. That project required much more manipulation due to some special circumstances with the door.